Wednesday, August 28, 2013

Tortilla Roll-Ups {Guest Post}

Hello readers!!  Today I am headed into surgery and will be down for a week or so. No worries, nothing serious, just something I need to do. In the meantime, some of my bloggy friends are taking over and telling you about their adventures in the kitchen. Awesome right? I can't wait to try these recipes myself when I'm back to normal again. So sit back, relax and enjoy these guest posts.

Today my friend Kathleen from Fearlessly Creative Mamma is sharing her Tortilla Roll-Ups. They look amazing!
_____________________________________________________________________________________________

Hi! My name is Kathleen and I blog over at Fearlessly Creative Mammas with my oldest daughter Samantha. We blog about all of our creative endeavors like recipes, crafts, parties or just tips that we have tried and liked. We love to spend time together as a family, cook, craft and travel. We hope you will stop by and visit sometime!  I'd like to thank Lori for having me on her site today and I hope you will love what I'm going to tell you about today. 

My father-in-law loves tortilla roll ups. I usually make him a batch for Father's Day and for his birthday, plus I make them when we have big family gatherings. We happened to have a big family gathering a few weeks ago and I thought I would share the recipe for Tortilla Roll Ups with you today. They are super easy and everyone always loves them. 

First you mix the sour cream and cream cheese together until there are no lumps. I like to do this in my mixer because otherwise you are mixing all day long. I don't have that kind of patience. 
Next you add the taco seasoning and mix it well.
Then you add the rest of the ingredients, except the tortillas, and make sure everything is mixed up really, really well.


Now you take your mixture and spread some on your first tortilla, all the way to the edge. Then you roll it up. Repeat until all of mixture is used. 


My husband eats gluten free, so I made two of these with gluten free tortillas and rolled and wrapped them up separately. 

Put them all in a container and refrigerate until they are firm. I usually make mine the day before we need them and refrigerate them overnight. 


 When you are ready to eat them, slice them up and serve. Then watch them disappear! They are so good and your friends and family with absolutely love them! 
Here is the recipe:

Tortilla Roll Ups

1 package of large flour tortillas (about 16)
1 cup grated cheddar cheese
1 package taco seasoning
1 small can chopped black olives
1 small can chopped green chilies
8 ounces cream cheese, softened
24 ounces sour cream

In a large bowl, mix the cream cheese and sour cream until it is smooth and there are no lumps. Add the taco seasoning and mix well. Add the cheese, olives and chilies and mix. Spread the mixture on the tortillas to the edges and roll up. Store in the refrigerator until firm. Cut up and serve. 


Tuesday, August 27, 2013

Easy Southwest Shrimp Cakes

Shrimp Cake Recipe
Since I am such a big fan of crab cakes, I wanted to try it with shrimp. I also wanted to bake them to avoid the excess oils that come with frying. I'm working to incorporate some healthier practices in my cooking while maintaining the adventure I strive each and every time I step foot in the kitchen. This southwest variety of shrimp cakes certainly fit the bill and they are very easy to make when you are in that weekday time crunch.
Ingredients
1 teaspoon shallot, chopped fine
2 eggs, beaten
Crushed red pepper to taste
Salt & pepper to taste
½ teaspoon parsley
¾ cup panko crumbs
Juice of 1 lime
Cooking spray
 
Directions
Preheat the oven to 350 degrees

Shrimp Cake Recipe
Combine all ingredients and press into 6 cakes by rolling the mix into balls then carefully pressing them down to form a cake the shape and thickness of a slider. 
Place the cakes on a sheet of parchment paper on a cooking sheet and bake for 13-15 minutes until toasted brown on the outside. 
These would be delicious served on a bed of mixed greens with a light dressing, such as raspberry vinaigrette or a creamy cilantro like you can get at Cafe Rio. The southwest flavors are delicious and not overpowering. The best part aside from the taste is that they are so easy. They can be whipped up really quick for a satisfying meal. 

Monday, August 26, 2013

Sweet Onion Salmon

Recipe for Grilled Salmon
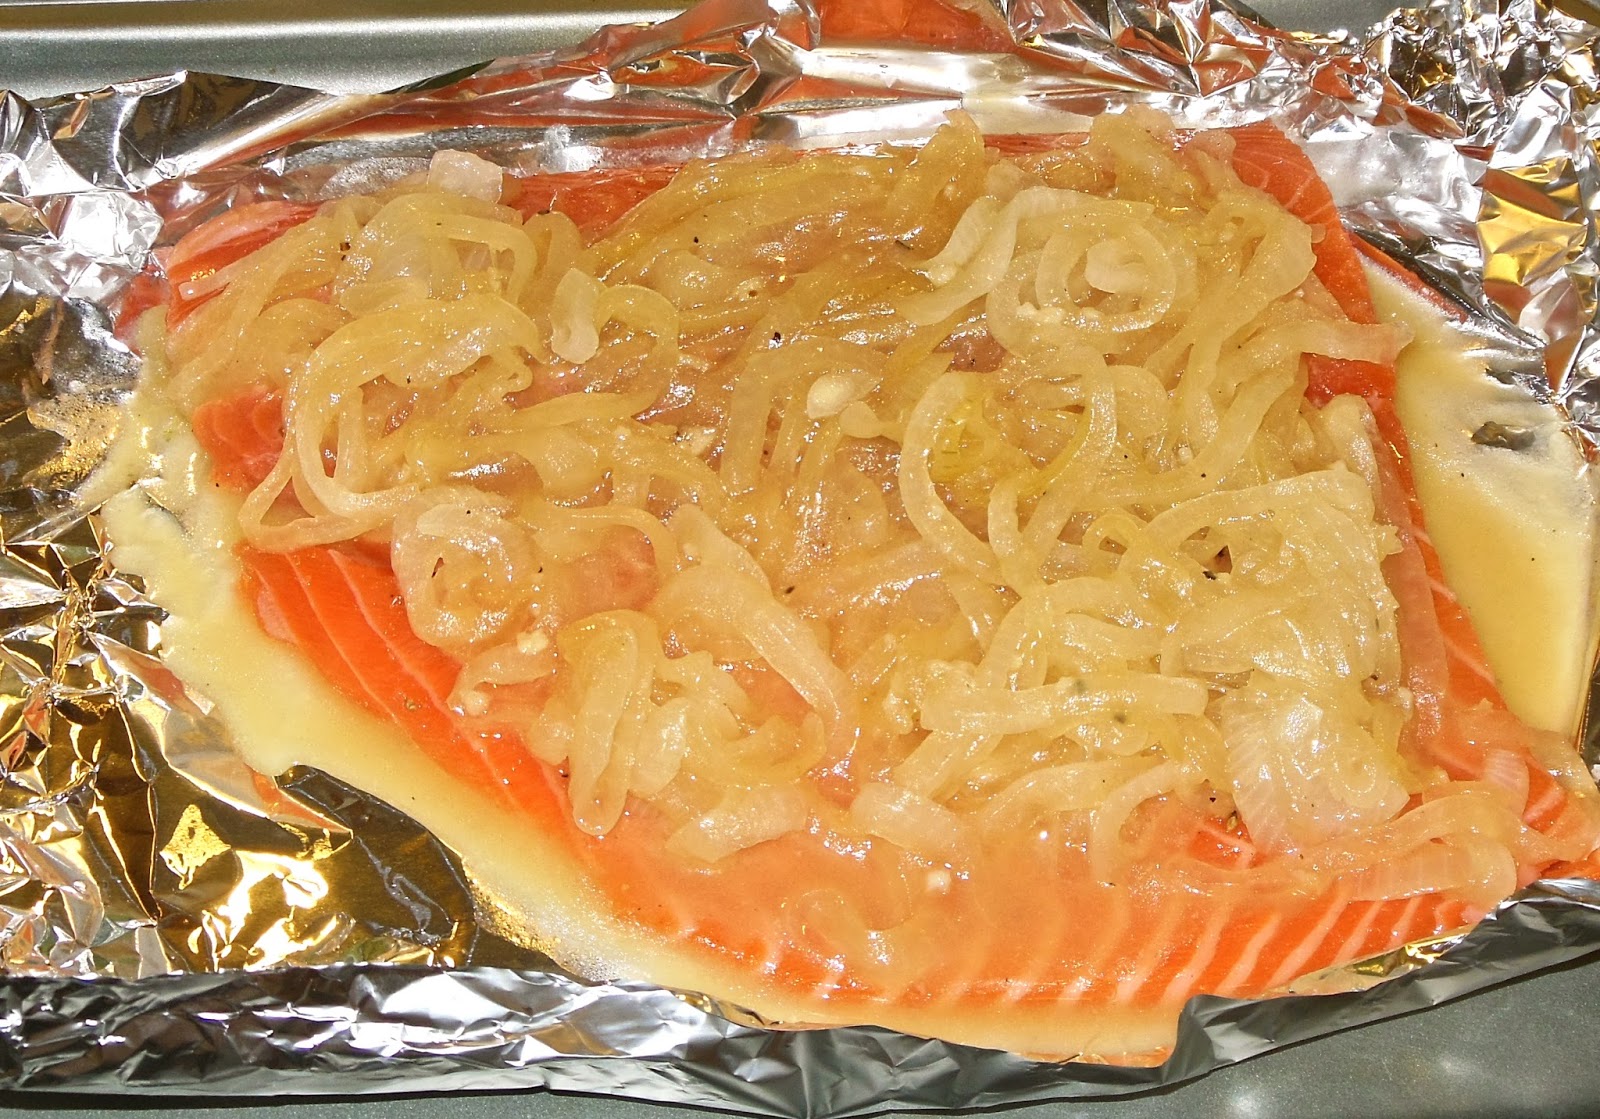
How I love salmon! It is so versatile and can go into so many recipes from tacos, to pastas or just grill it up on the barbecue. This recipe takes sauteed sweet onions and grills them right on top of the fish to pack a tasty punch to your salmon. You're probably looking at the photo thinking "That's way too many onions" and I probably would too. However by using sweet onions over red or yellow, it takes on a whole new flavor and it's not "onion-y" at all.

Sweet Onion Grilled Salmon 

Ingredients - Serves 4
3 medium sized sweet onions, peeled
2 Tablespoons coconut oil
3 cloves garlic, crushed
2 Tablespoons butter
1 cup crisp light white wine
2 Tablespoons dark brown sugar
2 Tablespoons sweet honey mustard
1/3 cup honey
Salt & pepper to taste
1.5 – 2 pound salmon fillet (I used half of the large fresh salmon from Costco) 

Directions
Slice the onions into rings on a mandolin set to thin cut. If you don’t have a mandolin, slice as thin as you can with a regular knife.
 
In a deep saucepan, heat the oil. Add the butter and garlic. Add the wine and cook the onions down until they are translucent. Add the brown sugar, mustard and honey and stir until blended. Salt and Pepper to taste. Turn to low heat and simmer about 15 minutes.
Rinse and pat dry the salmon fillet and place it on a large piece of foil. Salt and pepper the top to taste. Add about ½ of the onion mix to the top of the salmon and pour the ¼ cup of the liquid from the skillet around the fillet.
Recipe for Grilled Salmon
Seal in foil and cook on the grill over medium heat 15-20 minutes depending on the thickness of the fish. Use the excess onion mix as additional garnish for your fish.
This meal was served to company (hubby’s co worker) and I’m always a little nervous trying a new recipe idea when I have people over. I would rather taste test it myself to make sure it’s truly what I intended it to be, but no worries here. This fish dish was well received and it was all gone by the end of the meal.
  Follow on Bloglovin

Sunday, August 25, 2013

#MeatlessMonday: Fresh Beet & Goat Cheese Salad w/Lime Mango Dressing

Roasted Beet Summer Salad with Lime Mango Dressing
Ahhh summer! When the weather heats up we all head outdoors, thankful not to be cooped up inside while the snow falls outside. Now is the time to dust off the patio set and break out the plasti-ware for outdoor eating. When the temps inch upward, more cool summer salads come out of my kitchen.

This recipe for roasted beets with goat cheese on greens was inspired by a salad I had at Cat Cora's Kitchen at the Salt Lake Airport. I just fell in love with the mix of flavor and texture so I set out to duplicate it... or come close to duplicating it.

Ingredients for the Salad
3 beets cut to bite sized pieces, roasted (recipe follows)
1/2 cup sliced almonds, toasted
6 cups Spring Green Lettuce Mix
1/2 cup fresh blueberries
3 ounces goat cheese

To roast the beets:
Preheat the oven to 375°. In an 8-inch square nonreactive baking dish, toss the beets with the garlic, lemon juice, lemon zest, oil, and sugar. Season with salt and pepper and spread the beets in a single layer. Spray an 8-inch piece of parchment paper lightly with olive oil cooking spray and set it oiled-side down on the beets. Cover tightly with foil and roast, shaking the pan occasionally, for about 40 minutes, until the beets are tender. Chill for an hour in the fridge. You can do this a day ahead if you like.
Summer Salad Recipe
To toast the almonds:
Put 1 Tablespoon coconut oil in a small saucepan and heat to medium heat. Add the almonds and toast until the almonds are a darker brown and you get a nice aroma of almond. Set aside. 

Ingredients for the Dressing
1 fresh mango, chopped
juice from 2 medium limes
1 teaspoon olive oil
1 clove garlic, minced
1/2 teaspoon crushed red pepper flakes (or more if you like the heat)
1/8 cup fresh cilantro leaves, chopped

Directions
For the dressing, place all ingredients in a food processor and blend until smooth, but still slightly thick. You do not want this really runny and the mango should keep it at a thicker consistency. Chill in the refrigerator at least two hours. 
Summer Salad Recipe
Now that the beets are roasted, the almonds toasted, the dressing made and all has been chilled, it's time to assemble!  In a large bowl, place the spring greens. Add the beets, blueberries, goat cheese and sprinkle the top with the toasted, sliced almonds.

Serve to your guests with some crostini and a glass of light white wine while sitting on the patio enjoying a lovely summer evening. The crisp lettuce and the flavors of the beets and blueberries is just perfect! Add to that the lime mango dressing and you have a salad that will make your taste buds do the happy dance.
Summer Salad Recipe

Friday, August 23, 2013

Baked Coconut Shrimp and Zucchini w/Apricot Dipping Sauce

Baked Shrimp Recipe
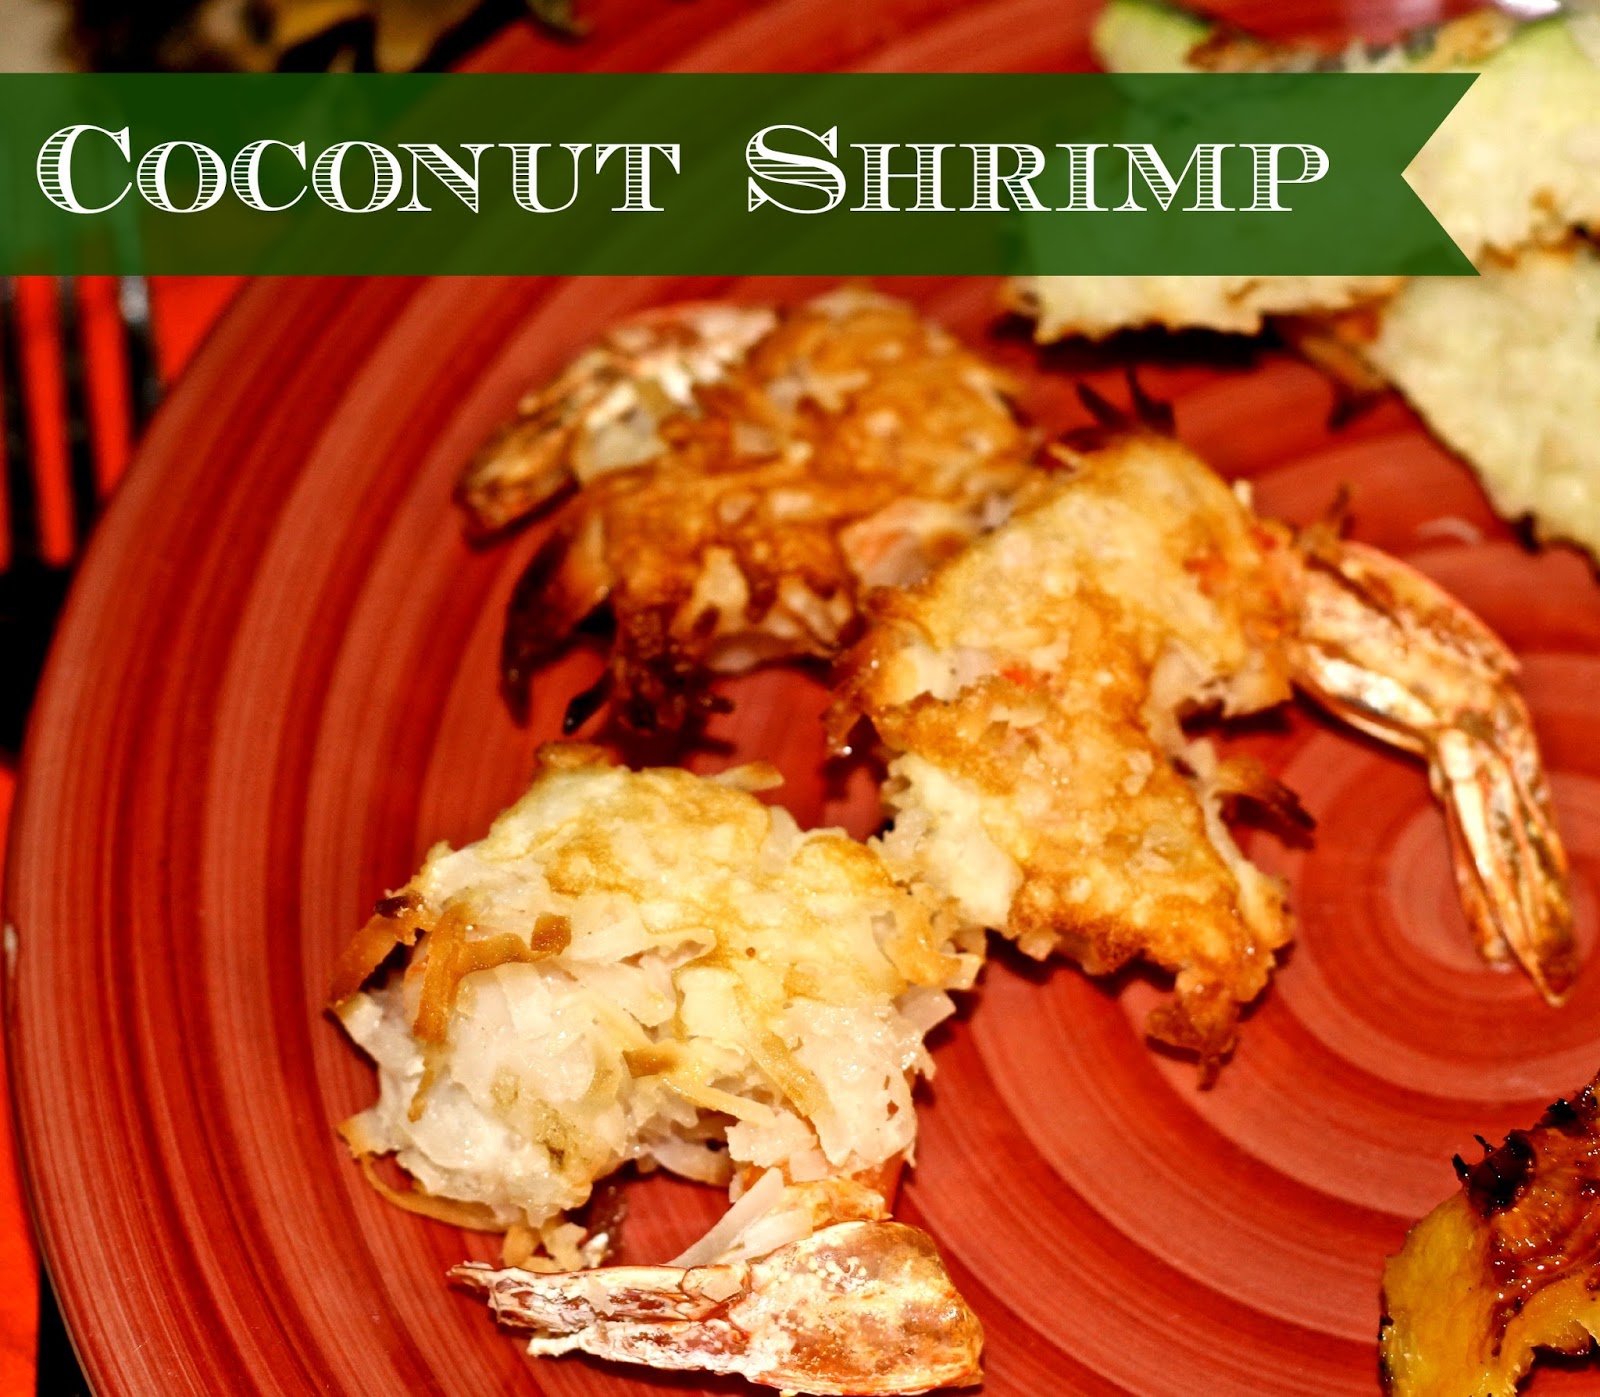
The other night, I set out to make hubby some coconut shrimp. We like Outback’s and wanted to duplicate it to some degree.  I planned to come home and whip up a tasty dish with some rice on the side and some veggies.  I had it all figured out… well I did until I got home.

I had only 6 shrimp. Just six. How would that feed me and hubby?  Boy, I sure didn’t plan as well as I thought!

So the adventure started on what to do with these few shrimp and a hungry man. I checked the fridge and decided to still make coconut shrimp but to also make coconut zucchini too. It sounded good in theory but did it satisfy me and hubby?  

Here are the ingredients I used.
2 fresh apricots
1 Tablespoon coconut oil
½ teaspoon crushed red pepper
6 large shrimp, peeled and deveined
2 medium zucchinis, cut into “2x4’s”
1/3 cup shredded sweet coconut
1 cup milk (or buttermilk or coconut milk)
Salt & pepper to taste

Directions
Peel the apricots and discard the pit. Add the apricots, coconut oil and red pepper to a food processor and blend until smooth. Chill in the fridge while the shrimp is cooking.
Baked Shrimp Recipe
Preheat the oven to 350 degrees.  Line a large cookie sheet with parchment paper.  Rinse the shrimp and zucchini and pat dry. In one coating tray place the milk. In another, the coconut. Dip the shrimp and zucchini, a couple at a time, into the milk then into the coconut and lightly press the shrimp & squash into the coconut so it sticks well. Place the shrimp and zucchini on the cookie sheet, spacing them evenly apart. Sprinkle with salt and pepper as desired.

Bake for 15 minutes in the oven, flipping them over at the halfway mark.
Hubby and I decided this meal was nice and light so we didn’t want to add rice and weigh it down. So instead, I sliced some fresh pineapple, basted them with a mix of honey, brown sugar and coconut oil and grilled them on the barbecue.  
That little side dish complimented the shrimp and squash wonderfully! 

Dinner disaster averted!! Keeping some fresh veggie on hand meant that we had  our coconut shrimp, but with a zucchini twist.  This turned out great and we almost didn’t miss the extra shrimp. What was your last Kitchen Adventure Quick-Fix? Let me know by commenting below.

Wednesday, August 21, 2013

Naturade Pea Protein Review plus Smoothie Recipe


Peach Smoothie
 When I first heard of Pea Protein, I was like “really?” I had never heard of it before. I’ve seen whey protein, but not Pea Protein. I was intrigued. I had a wonderful opportunity to try Naturade Pea Protein and I was surprised at how good it was. Wow!

About Naturade
The Naturade® research and development team is proud to introduce Naturade Pea Protein™. Pea Protein is a natural plant-based protein that is derived from yellow peas (Pisum sativum), also known as “split peas.” This product is highly soluble, easy to digest, hypoallergenic – and it tastes great! Naturade Pea Protein™ is formulated using only the highest quality pea protein isolate available. Its phenomenal amino acid profile includes nine essential amino acids. Since essential amino acids cannot be synthesized by the human body, they must be supplied by our diets. Amino acids are the building blocks of proteins and are used by our bodies to support our bones, muscles and connective tissues.

Naturade Pea Protein™ is all natural and contains no animal by-products, no artificial flavors, no artificial sweeteners and no artificial colors. We use non-GMO pea protein that is 100% gluten-free, cholesterol-free, soy-free and dairy-free. Each great tasting vanilla shake provides an excellent source of vegetable-based protein and is suitable for low-carbohydrate dieters, vegetarians, vegans, children, athletes and anyone needing extra protein in their daily diet. Naturade – your partner in good health!

My Thoughts
I love smoothies and couldn’t wait to make one with this. I was sent three pouches of the vanilla flavored protein and was looking forward to something peachy. So I mixed 2 cups frozen peaches, the protein packet and about a cup of water and blended it up nice and smooth. I added about a tablespoon of honey just before turning off the blender.
Peach Smoothie
I think I’ll name this drink my “peach vanilla cremesicle smoothie.” It was so good! The vanilla flavor was not over powering at all. Sometimes these protein pouches can smack you in the face with the strong vanilla flavor. This was nice and subtle and the peach flavor shined through. The powder mixed very well with the peaches and water so there was no chalky taste to my drink or funky aftertaste. Again, another plus.
Peach Smoothie
My delicious smoothie made with pea protein was easily digested and kept me feeling full most of the morning. With my busy schedule, it was a quick, nutritious, on-the-go meal that fit right into my lifestyle.
Peach Smoothie
Want to know more?
Learn more by visiting their Website and taking a look around at their other products.
Like them on Facebook. Stay up to date & vote in the #NaturadeSmoothie recipe contest.
Follow them on Twitter
Check them out on Pinterest where you can find recipes, health tips and more. 

I received one or more of the products mentioned above for free using Tomoson.com. Regardless, I only recommend products or services I use personally and believe will be good for my readers.

Tuesday, August 20, 2013

Avocado Kiwi Ice Cream with Caramel Swirl

This is month two for our Crazy Ingredient Challenge. The challenge is to come up with a recipe using two very unique ingredients not usually found together. Last month it was chocolate and cauliflower. This month: avocado and caramel.
Ice Cream Recipe
Wow…. This one really presented quite a challenge. I love avocado and put it in all my salads, top my burgers with it and can make a mean guacamole. I don’t eat much caramel in any variety so this one was a head scratcher. I told hubby about the challenge and his response “You can have it.” You see, he dislikes avocado in anything but guacamole. Well making a caramel guacamole that he “might” eat did not sound good to me, so I tried something hubby usually can’t resist: Ice Cream. I had just purchased a KitchenAid stand mixer and an ice cream attachment so this was the perfect opportunity to use it for the first time.
 
He was half intrigued and said he was willing to try it. Adding the sweetness of kiwi to the ice cream and marbling the caramel in it, I created a unique ice cream with creamy, sweet flavors all throughout. I substituted 1% milk for the whole milk and whipping cream for the heavy cream to lighten it up just a bit.
Adapted from Alton Browns Avocado Ice Cream recipe.
 
Ingredients
3 ripe avocados
2 kiwi’s, peeled
1 Tablespoon lemon juice
1 1/2 cups 1% milk
1 cup whipping cream
1/2 cup Sugar
Hershey’s Caramel topping

Directions
Blend the avocados, kiwis, lemon juice, sugar and milk in the food processor until blended smooth. 
Ice Cream Recipe
Remove and place in a bowl. Stir in the cream. Cover and refrigerate for 4-6 hours.
Ice Cream Recipe
Once chilled, churn the avocado mix in your ice cream maker for 7-10 minutes according to manufacturer’s directions. 
Ice Cream Recipe
Remove from the maker and put into a freezer dish. Swirl the caramel into the ice cream so it has “ribbons” of caramel throughout. 
Ice Cream Recipe
You can use as little or as much as you like. I didn’t note a measurement here since some of us like desserts sweeter then others. Cover the bowl and freeze for at least 5 hours. For soft ice cream, serve immediately.  Serve with a sliced kiwi as a garnish and more caramel!
Ice Cream Recipe
Incredible ice cream!  To give a quote from my co-worker and good friend Penny "I would buy this at the store!"  Hubby even said it was OK, which is HUGE since he's not an avocado fan. I think the combo of avocado and caramel turned out really, really good. I would so make this again!!

If you want to get in on the Crazy Ingredient action, click the graphic below to sign up!
HunngryLittleGirl
Related Posts Plugin for WordPress, Blogger...

Total Pageviews