Saturday, February 1, 2014
Tuesday, October 8, 2013
Arby's New Smokehouse Brisket Sandwich
This is a Sponsored post written by me on behalf of Arby's for SocialSpark. All opinions are 100% mine.
I love Arby's and find myself stopping by for a quick snack and sandwich fairly often. So when I saw the commercials showing the new Smokehouse Brisket sandwich, I was all over it. It looked incredible and had all the elements I like in a sandwich; good meat, soft bread, cheese, barbecue sauce and onion rings.
Only this isn't your typical sandwich... I think it's so much more. This is a delicious sandwich that starts with quality meat and is smoked low and slow for at least 13 hours and boy it sure tastes like it. We have a smoker at home and you can tell smoked meat vs. meat soaked with liquid smoke. This was for sure smoked for a long time and I love the flavor and aroma that I experienced. And the meat was flavorful and tender. No gristly fat on this sandwich! No way! The smoked gouda cheese adds an extra unique flavor to this sandwich and the barbecue sauce and mayo added was just enough that it did not leave the bread all soggy. I was also pleasantly surprised that the bun wasn't your typical sesame seed or plain bun you find these days but a soft bakery style bun that was delicious and didn't take away from the smoky sandwich flavor. Pair this with one of my Arby's favorites, curly fries, and I had a delicious and satisfying lunch on a chilly rainy day.
Can I also just say how much I love Arby's spokesman Bo Dietl? He's a "real" guy and not some flashy model and that is refreshing to see these days. I just had to throw that out there.
Is your mouth watering yet? Find an Arby’s near you and grab your own brisket sandwich. It's available as a single sandwich or you can have it in a combo with those yummy curly fries and a drink.
Tell me..... why are you excited to try the new Smokehouse Brisket? Leave a comment below and tell me if you've tried it or why you're excited to try it. I'd love to hear from you.
Thursday, September 26, 2013
Peach Mango Sorbet
Simple Syrup
2 cups sugar
Meanwhile, make the simple syrup. Place the ingredients into a saucepan and heat through until sugar is completely dissolved. Place this in the fridge and chill completely, about 2 hours.
Bring out your ice cream maker and churn according to manufacturers directions. I have a Kitchen Aid Stand Mixer with the ice cream attachment. I churned it on setting #1 for almost 10 minutes until the texture was the way I wanted. I chilled this mix in the freezer for about 4 hours or until Hubby couldn't wait any longer. If you like a softer sorbet, chill for a shorter amount of time.
Thursday, September 19, 2013
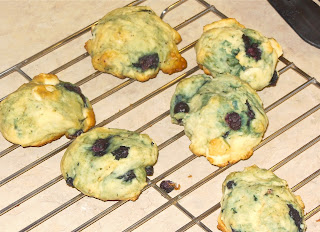
Blueberry Chocolate Chip Cookies
This recipe was adapted from The Pinterest Project and I substituted blueberries for raspberries and skipped the lemon. I also made the error of using Almond Extract instead of vanilla since I grabbed the wrong thing out of the pantry. But no worries, it turned out really great.
1/2 cup butter
1/2 cup cream cheese
1/2 sugar (or Xylitol)
1 egg
2 Tablespoons Vanilla Extract (or Almond like my "error")
1 Tablespoon water
1-1/2 cup flour
1 teaspoon baking soda
1 teaspoon salt
1 cup blueberries
1/2 cup white chocolate chips
1/4 cup dark chocolate chips
Directions
Pre-heat the oven to 350 degrees
In a large bowl, add the butter, cream cheese and sugar and blend until creamy. Add the egg and blend together. Add the extract and the water and blend until smooth. In another bowl, whisk together the flour, baking soda and salt. Slowly incorporate the dry ingredients into the wet. Blend together.
Since I was making this with two types of chocolate, I divided the mix into 1/3 and 2/3 dough mixes. In the large one, I added the white chocolate chips since hubby loves cookies more then me. I'm so nice to give him the 2/3 batch.
In the small batch (the 1/3), I added the dark chocolate chips. I then blended the blueberries into each batch, again dividing 1/3 & 2/3. If you are using frozen blueberries (thaw them first :-)), blend them in carefully as you don't want to squish them.
Roll the dough up into little balls and place on a lightly greased cookie sheet. I made it easy on myself and used a melon baller to scoop them up and drop them on the cookie sheet.
Bake 11-13 minutes or until done. One thing I did with my second round of baking was to flatten out the little balls so they cookies were less fluffy and more like a regular shaped cookie. This is up to you how you want to do them, but the baking time is about the same.
Tuesday, September 17, 2013
Fresh Whole Wheat Pizza Crust
With the flour mill, it's time to make a whole wheat from scratch pizza crust. There is a small pizza and sandwich place here in West Jordan, UT that I enjoy purchasing pizza from since they make a whole wheat crust. But now was time to make my own so out came the WonderMill and a crust was born.
This recipe is adapted from How Sweet Eats.
Whole Wheat Pizza Crust
1 1/2 cups whole wheat flour
1 teaspoon dry active yeast
1/4 teaspoon salt
1/2 cup lukewarm water
1 tablespoon olive oil
1 tablespoon honey
1 Tablespoon Italian seasoning
1 teaspoon garlic powder
Directions
Combine flour, salt and yeast in a large bowl. Add water, honey, oil, Italian seasoning and garlic powder, mixing with a spoon to form into a ball. Continue mixing with your hands and kneed for about 60 seconds. Lightly oil bowl and add dough back in. Cover and let rise for 2-3 hours.
After 2-3 hours, remove from bowl and punch down. Roll back into ball and let sit for 30 minutes.
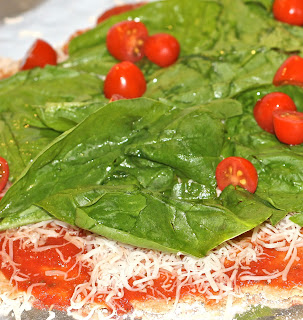
I just rolled out one pizza crust and it was a funky rectangular shape that reminded me of a map of the state of Illinois, lol. Hubby and I like different things on a pizza so we each topped our halves with something different.
He had fresh spinach, cherry tomatoes, grilled chicken, mushrooms and mozzarella cheese with a drizzle of srirracha sauce.
My half was vegetarian. I had fresh spinach, mushrooms, cherry tomatoes, mozzarella, capers and goat cheese.
This was one delicious crust!! If you have a pizza stone, put it in the oven while you're pre-heating it so it's nice and hot. It will give you a nice crispy crust. This crust was so good and I love the honey that was added to it. Next time, I will use small chunks of fresh garlic in my crust so it has that burst of flavor in every bite. Hubby loved his toppings but I think mine were better.
Saturday, August 31, 2013
Designer Inspired Handbag Giveaway!!!
Here are are some of the many bags you’ll be able to choose from if you win!
Thursday, August 29, 2013
Mom's Baked Hot Dogs with Beans
When I was a kid, my mom would make hot dogs for my sister and I. It wasn't just a dog in a bun, but it was cheesy baked dogs with pork and beans. My sister and I loved this and requested this often. She would cut the dogs down the middle and insert ooey gooey cheddar cheese which would melt and be so good when cooked. It's a traditional "mom dish" that we make when we grew up for our own kids, nieces and nephews. I loved it so much I wanted to share it with you so you can make this kid friendly delicious dish at home. I did modify mom's recipe a bit by adding bacon and brown sugar.
Ingredients
1 large can of pork & beans or baked beans
4 strips of bacon cooked and chopped
3 Tablespoons dark brown sugar
4 all beef hot dogs
4 ounces of cheddar cheese
Directions
Preheat oven to 350 degrees
Mix the beans, bacon and brown sugar and place in a glass baking dish.
These are so good and your kids will love this cheesy new take on hot dogs. For the little ones, you can cut it into bite sized cheesy pieces they can easily pick up with their hands. Serve with your favorite side dish. We had some garlic bread and a side salad.
I hope you enjoy my mom's baked hot dog recipe. It's been a hit in our family for years. Do you have an easy family recipe? Share below in the comments.


